Easy guide to Mortimer Freeze | Cuphead: The Delicious Last Course
Mortimer Freeze is one of Cuphead: The Delicious Last Course's new bosses and this guide will cover an easy method for beating the shivering sorcerer. Note that this may not be the fastest way to defeat the Mortimer but it is certainly one of the easiest.
Before entering the boss fight be sure to equip the following items:
- Shot A - Crackshot
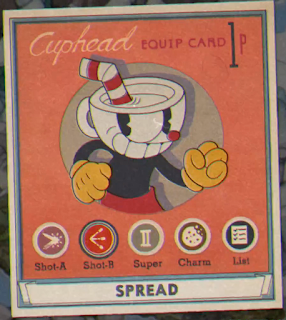
- Shot B - Spread
- Super - Shield Pal
- Charm - Astral Cookie
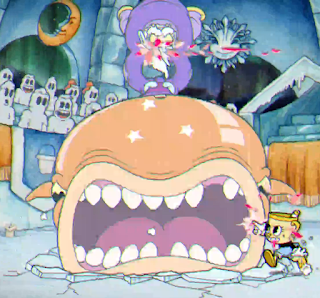
Most of this kit is the same as the one used to defeat the Moonshine Mob, and for the same reasons. There is one key new addition here though. By swapping out Roundabout for Spread, the second phase of this fight goes much faster due to the high damage per second against close range targets.This boss fight consists of three phases and the first is probably the most difficult. Mortimer will begin by flying above the player, moving from side to side and using one of three attacks. For the first, he will summon four ice minions in a row and fire them diagonally towards the player. The best way to deal with this is to move to one side of the screen, avoid the minions as they fall and then get to the other side of them as fast as possible for more space. The minions can be destroyed using Crackshot, which should otherwise be used constantly on the boss. The second attack is a giant slam attack which he will use as he passes over the player. This is easily avoidable by just dodging out of the area in either direction. Mortimer's final attack is a slow moving projectile that looks like a playing card. Some of these will be pink and can be parried and Mortimer can fire either once or twice in a row.

|

|

|
Beating this phase will trigger Mortimer to ring a bell and summon a snowy golem which has four attacks. If it turns into a fridge it will begin launching ice cubes in an arc which will split in two and bounce in opposite directions, repeating until they are small enough to break. The best way to avoid this is by standing just next to where the ice cube will land and then stepping onto where it landed once it has broken. The next attack to be wary of is the flock of flying ice lollies. These will fly from the top of one side of the screen and off the other side before several move across the bottom of the screen one at a time in the opposite direction. Jump over them and parry the pink ones or shoot them if you cannot jump over them in time as they are very weak. Last but not least is the golem's two pronged attack, the roll and jump. After a short wind-up, the snow monster will either roll across the ground or leap in an arc from one side of the screen to another. This can either be a one-off attack or a sequence of up to three rolls and jumps. When it pulls backwards it is going to do the roll attack so be ready to double jump and dash over it and when it raises its body slightly it is going to do the jump attack which can be avoided by literally standing in the middle of the screen and not moving. The final attack it can use is a ground slam that does no damage on its own but summons three swords from the ground. The swords appear in a staggered manner with the sword nearest to the boss rising first and then the middle sword and finally the furthest. As soon as he slams and snow rises into the air you should move off of any snow patches that look like they are about to burst upwards. This phase is where Spread comes in incredibly handy. Stand right next to the boss and fire away into it as much as possible while avoiding its three attacks.Last but not least the golem will split and its top half will rise into the air and become a huge snowflake, the final mini-boss. When this happens the camera will pan upwards and you will need to jump onto the platforms to move with it until you reach the five circling platforms. Swap back to Crackshot here and shoot the boss constantly while maintaining as much distance from it as you can by jumping between the platforms on the opposite side of the screen. This final phase has three attacks in its arsenal but only one of these attacks will ever occur at once so you won't have to worry about being overwhelmed as long as you can handle each individually. Something to note here is that the snowflake will periodically swap to the other side of the screen at which point you should do the same to ensure you are as far away as you can be. The first is very simple to deal with as an eye will pop out of the boss and travel across the screen and back again. The eye will fire a laser up and down periodically so just after it fires on its way across jump over it and then wait for it to do the same on the way back and leap back to where you were. If a ghost flies out of the snowflake and around the screen be ready for several snow cone projectiles to spawn along its path. These move slowly so stay in a corner and jump over any that come close. Trickiest of all is the snowflake's last attack where it fires out three buckets in sequence, one of which will be pink and can be parried. Each will fire in a random direction and when it hits the back of the screen it will fire three moon-shaped projectiles back in a spread pattern. Jump over any buckets that might hit you and beware as they hit the side to jump over the returning moons.
A couple of side switches later and the snowflake will go down, and with it that's the boss defeated! Claim another ingredient and continue your journey to free Ms. Chalice. If you need more easy guides to defeat the DLC bosses be sure to follow Critical Win as there will be a guide for each of them.


Comments
Post a Comment